Programming a Arduino Mini Pro 5V ATMEGA328 with a PL2303
Parts Required:
Programmer USB to TTL UART (PL2303)
4 Female to Female Juper Wires
Arduino Mini Pro 5V ATMEGA328
Drivers
Windows (8/8.1/10 are not compatible with this UART)
Windows Driver Installer Setup Program
(For PL2303 HXA, XA, HXD, EA, RA, SA, TA, TB versions)
Installer version & Build date: 1.10.0 (2014-09-25)
Windows XP (32 & 64-bit) WDM WHQL Driver: v2.1.51.238 (10/22/2013)
Windows XP Certified WHQL Driver
Windows Certification Report
Compatible with Windows 2000SP4 & Server2003
Windows Vista/7/8/8.1 (32 & 64-bit) WDF WHQL Driver: v3.4.67.325 (08/15/2014)
Windows Vista, 7, 8, 8.1, Server 2008R2, Server 2012, Server 2012R2 Certified WHQL Driver
Windows Certification Report
Compatible with Windows Server2008
Compatible with Windows 10 (PL2303HXA/XA are not supported)
Driver can auto-download via Windows Update (for Windows 7/8/8.1/Server2008R2/2012/2012R2)
MAC
Mac OS X Universal Binary Driver v1.5.1 (PKG file format)
For Mac OS X 10.10 Yosemite (64-bit)
For Mac OS X 10.9 Mavericks (64-bit)
For Mac OS X 10.8 Mountain Lion (64-bit)
For Mac OS X 10.7 Lion (32-bit and 64-bit kernel)
For Mac OS X 10.6 Snow Leopard (32-bit and 64-bit kernel)
For PL2303 H/HX/HXD/EA/RA/SA/TA/TB chip versions
For Prolific USB VID_067B&PID_2303 Only
Includes Driver Installation Manual
Prolific Website
Steps
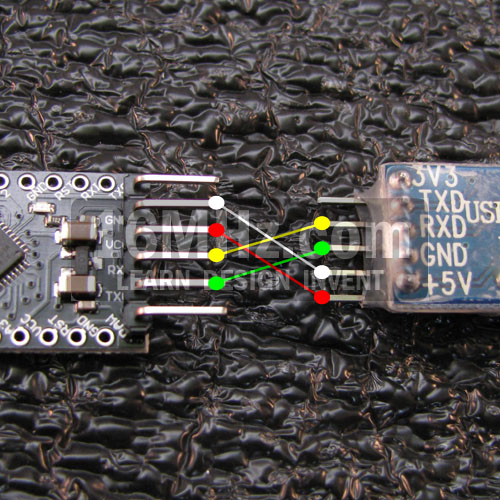
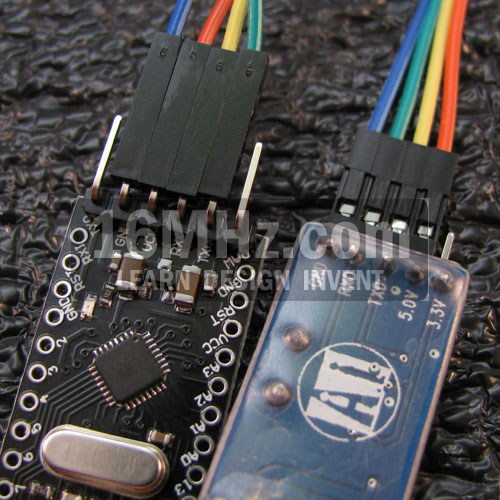
1. Connect jumper wires VCC and Ground to Mini Pro. (Check for UART brand below)
2. Plug in Programmer into USB port.
3. Red LED on programmer, Red LED & Flashing Blue LED on Mini Pro should all be operational.
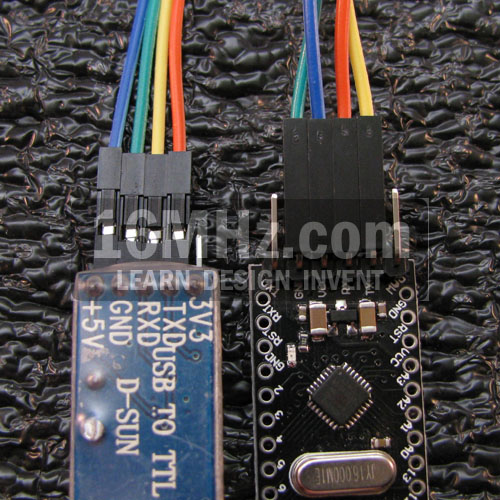
4. Connect jumper wires to TX—>RX and RX—>TX (See Image 1 & 2)
5. In IDE choose Board: Arduino Pro or Pro Mini (5V, 16 MHz) with ATMEGA328
6. In IDE choose Com Port:
7. Load Sketch.
8. Click Upload and wait for the LED next to Power LED on Programmer to Flash. (Sometimes very faint)
9. Push Reset on Mini Pro and release. You should see TX/RX LED's Flash on Programmer.
10. Sketch should be loaded.
Besure to check to see which UART was shipped with you order.
VERIFY UART STYLE
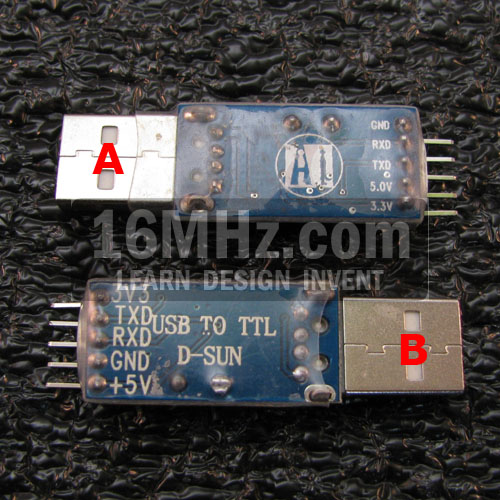
UART A
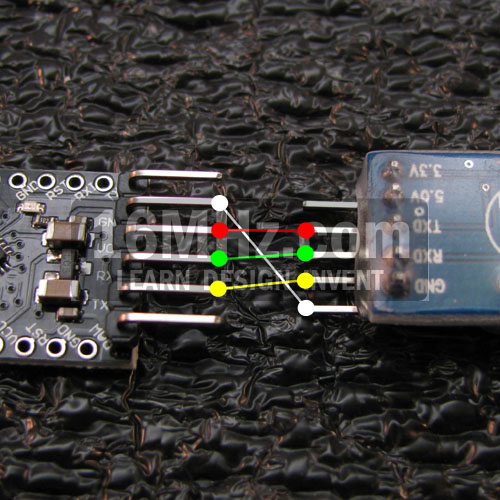
UART B